| Cheque Book |
|
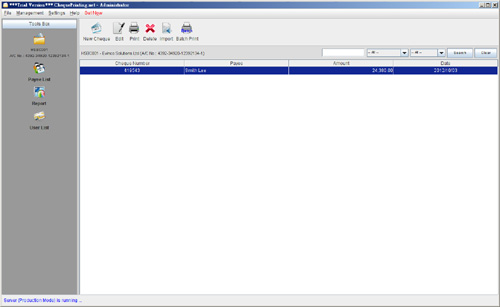
Click [New Cheque] or [Edit] will open the cheque window as follow. 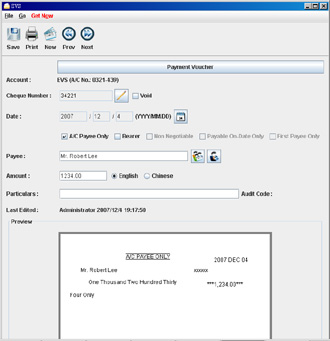 In the Tool Bar, you can save and print the cheque. You can also create a new cheque or click the [Prev] or [Next] button to go to previous or next cheque. You can fill in your cheque details or click the [Payment Voucher] button to prepare payment voucher. Account – show the current account information, name and account number. Cheque Number - cheque number will be generated from the sequence defined in cheque book automatically. Void - mark the cheque as void and it will not be counted in report calculation. Date - date of the cheque. Click the "Calendar" icon to pick the date. A/C Payee Only - mark the cheque as "Crossed". Bearer – check the box if you want to make the cheque as "Bearer Cheque". Payee - Fill in the Payee Name or click the icon to select from the Payee List. Amount - Input amount here. The text will be generated according to the input amount automatically. Particulars - A field for you to store some notes about this cheque. Audit Code – A field to store information for account tracking. Remark – Another field to store notes. Categorize your cheques using the "Particulars" and "Audit Code" fields for Account Audit and Cheque Register Report generation. Note that information entered in the Particulars, Audit Code, and Remark fields will not appear on printed cheques; these fields are for internal record-keeping only. While you fill in the cheque details, the preview pane will show the cheque image at the same time. |