How to create a cheque book?
- In menu "Management", choose "Cheque Book Management"
- Click the
 icon to create a new cheque book.
- A "Cheque Book" dialog is shown out.
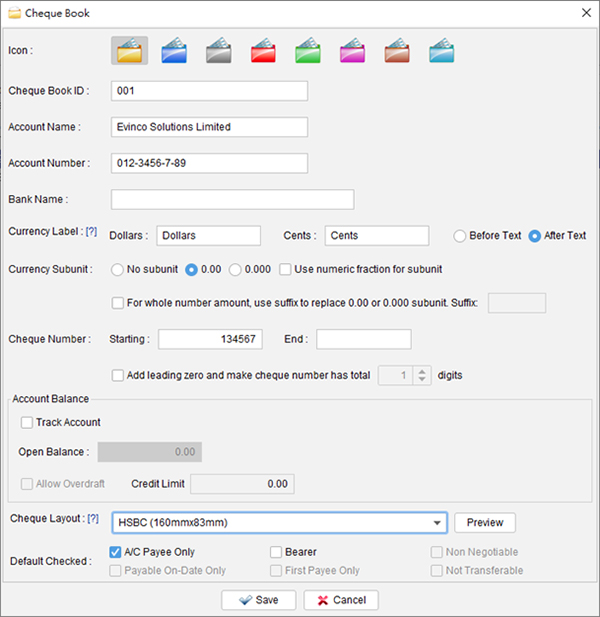
- You need to specify the following information:
- Cheque Book ID - a identifier for your own reference, which shown in the Tools Box.
- Account Name - The name of account which this cheque book belongs to. It is shown in the Tools Box for informative purpose only.
- Account Number - Account number for which this cheque book belongs to. It is for informative purpose only.
- Numbering System - Choose the currency label and subunit.
- Starting Cheque Number - The next cheque number of your cheque book. This number will be increased for every cheque issue. It is useful for you to keep track your issued cheque.
- Balance Tracking - Assign a account balance if you want to perform balance tracking.
- Cheque Layout - Choose the cheque layout which this cheque book fit to.
- Click the "Save" button when ready.
- The newly created cheque book will be shown in the "Cheque Book Management" window.
- When you return to the main window, you should also find the new cheque book under the "Tools Box".